

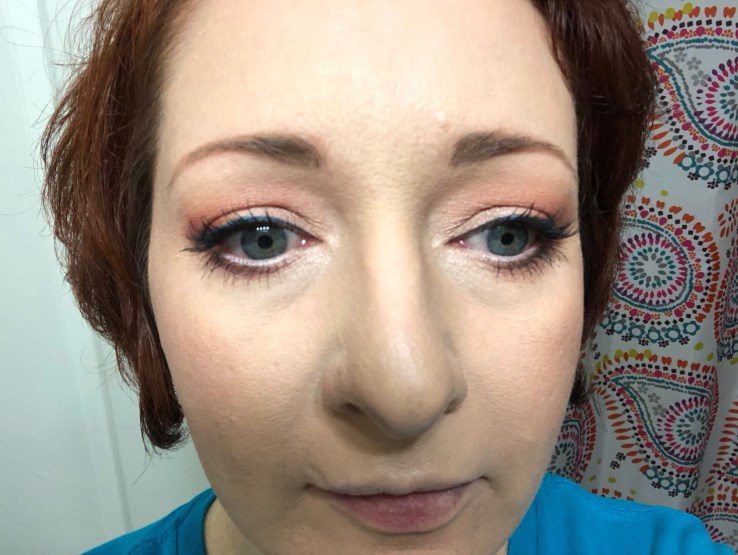
Dark circles, eye bags… any way you slice it, under-eye discoloration is something that comes with age and/or lack of sleep. Here’s how I cover it.
Disclaimer: I now have affiliate links. If you click on a link or ad and you buy something, I may get a small commission at no cost to you. I only link to products that I use and like. Also, as always, this post is not sponsored.
Dark under-eye circles can make you look older than you are.

That’s not news. Given our society’s obsession with youth, we all want to look younger, bright-eyed, and more awake. The issue is when you use too much concealer, too many products, or the wrong type of products, that sort of thing can also make you look older than you are.
So, what’s a person to do?
Use a little less product. Do fewer layers. Find the right products for your skin. It may take a bit of trial and error to figure out what works best for you, but when you do, it’s worth it! What follows is my step-by-step how-to on using under-eye concealer when you’re over 40. (You can also use these steps if you’re under 40.)
1. Prep your skin!
I cannot overstate the importance of good skin care! If you’re taking good care of your skin, you don’t need to cover so many sins. For everything else, there’s concealer.
Start with clean, moisturized, and, if you’re going out during the day, sun screened skin. If you feel you need a little extra something to keep your under-eye concealer from looking dry and to make it go on a little smoother, warm a drop of dry-finish facial oil between your finger tips, then gently press and pat the oil into your under-eye area.
Facial oils I use and recommend for this are Rosehip seed oil, maracuja oil, grape seed oil, argan oil, or jojoba oil. Give the oil a few minutes to absorb into the skin before you apply your primer and start your makeup.
2. Apply color corrector. (Optional)
Sometimes, my under-eye area looks a bit darker than usual. On those days, I use color corrector. This step is optional. I don’t use color correctors every time I put on makeup, only on days when I feel I need it.
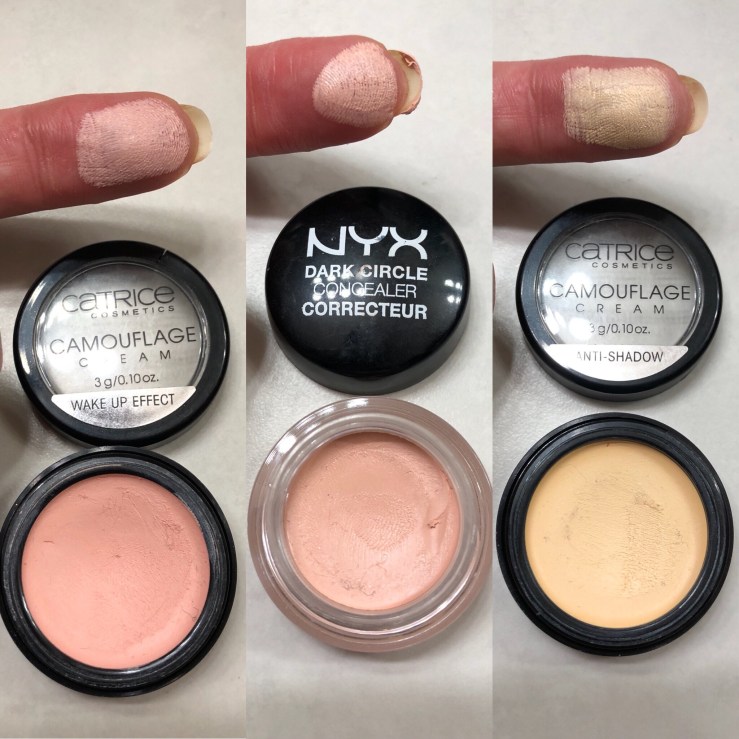
If your under-eye area is more blue, use an apricot or peachy toned color corrector. (Orange and blue are opposites on the color wheel and will cancel each other out.) I like the Catrice Wake-Up Effect color corrector (peach) and the Nyx Dark Circle Concealer (apricot).
If your under-eye darkness is more purple, a yellow color corrector should do the trick. (Purple and yellow are also color wheel opposites.) The Catrice Anti-Shadow color corrector is a good one. If you have a deep or dark skin tone, there are orange toned color correctors that should work well for you.
If you use face primer, apply that first. Then use your ring finger to lightly dab the color corrector onto the darkest parts of your under-eye, the inner corner, and the outer corner if you have discoloration there.
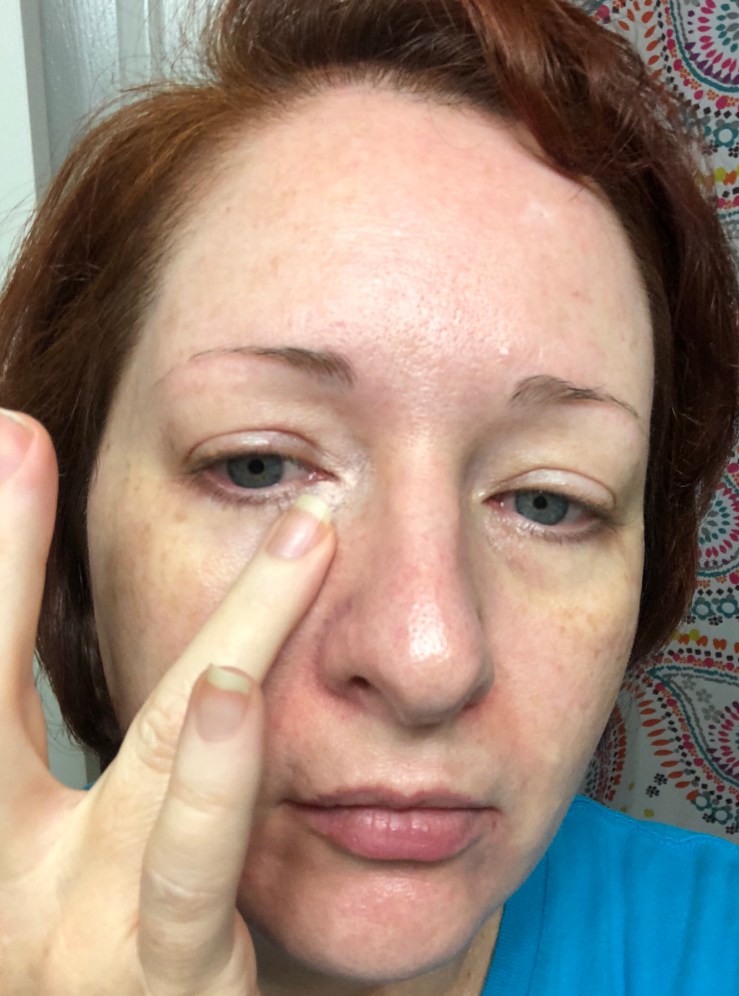
IMPORTANT: Don’t use too much! The idea is to use just enough corrector to put a sheer veil of color over the dark areas to cancel them out. I suggest the ring finger because it has the lightest touch of all your fingers. You want to use the lightest touch on the delicate under-eye skin.

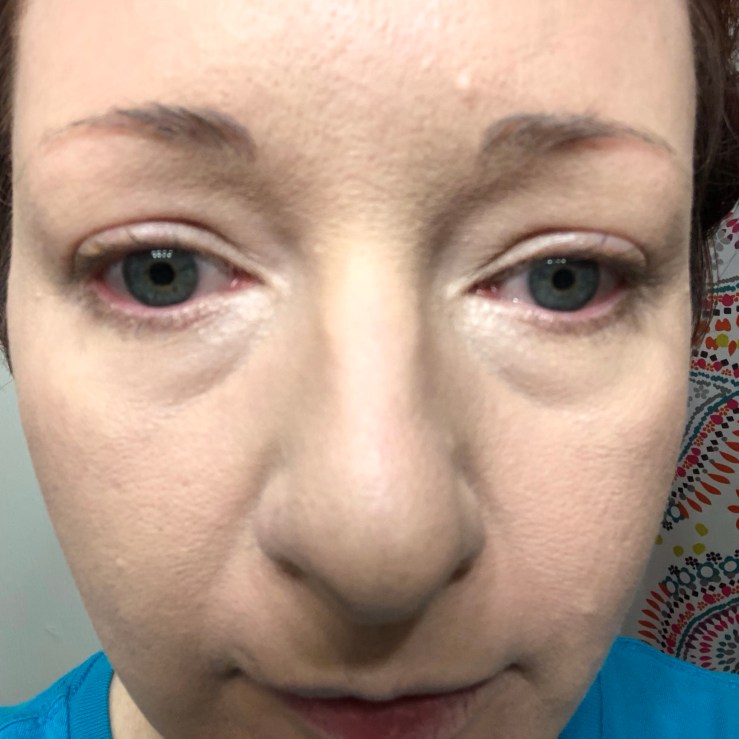
3. DON’T take your foundation up under your eyes.
I see a lot of beauty gurus on YouTube dabbing their foundation right up under their lower lashes, then putting on a LOT of high-coverage concealer, blending it out, then setting it with a bunch of powder. That’s fine if you don’t have much texture there. I find that putting foundation AND concealer AND powder under my eyes makes for a creasy, cakey mess by lunch. The fewer layers I put under my eyes, the better.

When you apply your foundation, make sure to avoid your under-eye area. That will be one less layer to crease and cake into wrinkles and crinkles later in the day.
4. Choose your concealer.
If you feel you only need a little coverage, choose something lightweight. I like the Maybelline Instant Age Rewind on days I don’t need a lot of coverage.

If you want or need more coverage, choose something a little more heavy duty. For my more full-coverage days, I like the Makeup Revolution Conceal & Define, the Nyx Gotcha Covered, and, of course, Tarte Shape Tape concealer.


As for color, if you want to brighten up your under-eye area, use a concealer that is one, maybe two shades lighter than your foundation. Otherwise, use a shade that’s as close to your foundation shade as possible.
For brightening on my pale skin tone, I use the Maybelline instant Age Rewind, Nyx Gotcha Covered, and Tarte Shape Tape in Fair. I use the Makeup Revolution Conceal & Define in shade C1.
5. Apply less than you think you need.
It’s easy to go overboard with concealer. If you have a lot of texture under your eyes, piling on too much concealer will only accentuate that texture. It’s easier to add more concealer if needed than it is to take it off.
Start with a small amount. When I say “small,” I mean minuscule. If using one of the full coverage concealers mentioned above, start with two small dots on the darkest part of the under eye, usually the inner corner near the nose, and one small dot at the outer corner (if needed).

If using the Maybelline Age Rewind, dab the applicator lightly all over the under-eye area in a triangular shape and a little past the outer corner of the eye.

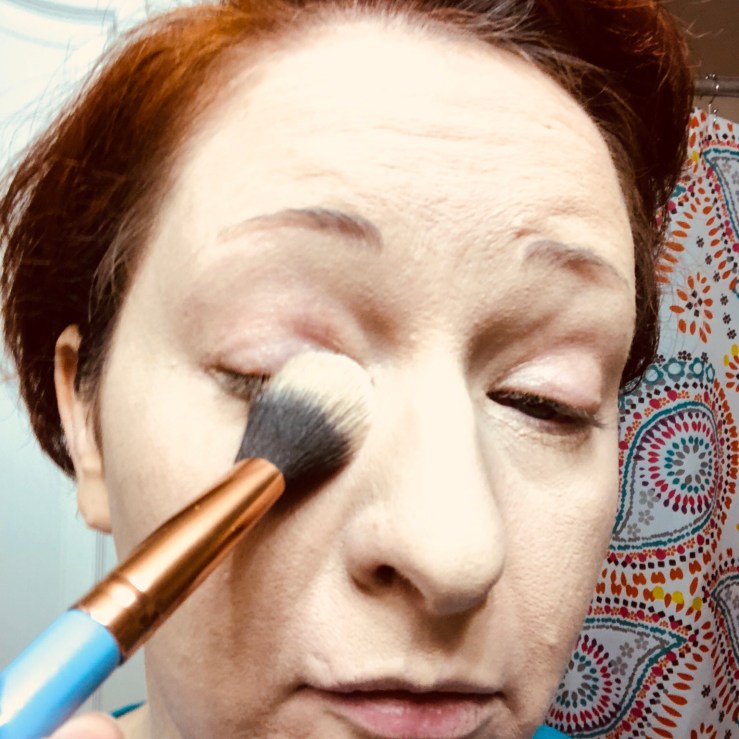
6. Blend, blend, blend!
With the Maybelline Age Rewind, I like to use my ring finger to blend it out. The warmth of my fingertip seems to help it blend out more smoothly and easily. Same goes for the Nyx Gotcha Covered concealer.

If you’re using the Makeup Revolution or the Tarte concealers, you can use your finger, a small brush, or a damp blending sponge to blend the concealer in a triangular shape and a little beyond the outer corner of the eye. These concealers tend to blend out well with any of these tools, and a little goes a long way!

Why blend in a triangular shape? Blending the concealer in a triangular shape will help bring light down on to the cheek below the eye and avoid the look of highlighted half moons under your eyes.
6a. Assess, then go back to steps 5 & 6 if needed.
Step back and take a look at yourself. If you feel like you could use a little more coverage, add another tiny dot or two of concealer and blend it out again. Then step back again and assess your look. If you feel like your darkness is covered enough, go on to step 7.
7. Set with a little powder.
For this, you will need a small, fluffy brush and a finely milled setting powder. The one I really like is the e.l.f. Under-eye Setting Powder. It’s really affordable and sets my under-eye area beautifully.

Put a little powder in the lid of the container. Swirl your brush in the powder and tap off the excess. Take your ring finger and lightly tap the concealer under your eye to smooth out any creasing that may have occurred. Immediately pat the powder on the brush under your eye. Repeat on your other eye.

8. Continue with the rest of your makeup.
I tend to do my face first, then my eyeshadow. I find this concealer method also works if I do my eyeshadow first, then my face.
9. When you spray your face with setting spray, spritz a blending sponge and dab under your eyes. (Optional)
I do this from time to time if I feel like I want to make sure my under-eye concealer isn’t going anywhere. I will also do this if I feel I got a little carried away with the setting powder. It helps take care of any dry look and lock your concealer in place. you literally just spritz a blending sponge with the setting spray of your choice, then dab under your eyes where you applied your concealer. That’s it!

Keep in mind this method will not keep your under-eye area completely crease-free. What it will do is help minimize the look of crepiness, minimize concealer creasing, and help reduce the amount of makeup that ends up gathering in the creases under your eyes.
Remember to experiment!
You may find you prefer a more emollient concealer to cover under-eye darkness over a more dry feeling one. You might find a lightweight concealer more to your liking than a full-coverage one. Maybe you like using an illuminating powder to set your under-eye, rather than a powder with a matte finish.
The main thing to remember is that it’s just makeup. What works for me may not work all that well for you, and vice versa. Don’t be afraid to try different products and techniques. Most importantly, remember that you are beautiful!

I’ve tried using just concealer under my eyes without taking the foundation all the way up to my lower lash line, but I could never get it to look good. If I pick a concealer that matches my foundation, it doesn’t completely cover the dark circles. If I get a concealer that actually covers the dark circles, it will look obvious because it doesn’t match my foundation. Unfortunately, the skin around my eyes is waaaaaaaaaay darker than yours (even on a good day) so it may just be that your technique won’t work for me. Regardless, thanks for the tutorial and recommendations. I’m going to try the e.l.f. powder and the Tarte concealer!
LikeLike
Hey, Leslee! Great to hear from you! Sounds like you might want to try using a color corrector under your concealer. Depending on whether your darkness is more blue or purple, a peachy or yellow color corrector should make it so you don’t need a lot of concealer under your eyes. There are good, affordable color correctors on the market, I just don’t know what’s available in Germany.
LikeLike
This would have been way better demonstrated with video. I don’t know what’s really going on here, especially where you say that you don’t put it on all the way close under the eye. I know it’s an old post, but maybe time for a do-over.
LikeLike
You may be right, it probably would be better with a video. At the time I made this post, I had no intentions of doing videos. I have played with the idea of doing beauty videos on YouTube geared toward the 40+ crowd, but the beauty space there is so crowded. Also, in-depth makeup tutorials just don’t get the views like they once did.
LikeLike
Ahh, got it. I thought you were doing it to cater to YOUR audience; not just for views. How millennial of you.
Just joking there, but got it.
LikeLiked by 1 person